When you set up your ADSL service for the first time there are a few important things to consider like where to place the ADSL router and whether or not to use wireless connections. Remember that you can always change things at a later date if you need to.
Before we look at how to connect everything together lets look at each of the cables and boxes that make up your ADSL connection.What are each of the wires and boxes for?
If you are new to ADSL then the various wires and boxes that you need to connect up can be a little confusing. Even if you have used ADSL before it will still be helpful to know what each of the wires and boxes are called so that there is no confusion if you need to troubleshoot any problems later.
The ADSL Microfilter
The ADSL Microfilter is a little bigger than a matchbox. This is the box that separates the ADSL and telephone signals so that they do not interfere with each other and also enables you to use the phone whilst on the internet at the same time. .

As you can see there is a standard UK style telephone plug which connects to your telephone socket just like a telephone. On the box itself there are two sockets one that you can plug a telephone into and one that connects to your ADSL router.
The ADSL RouterThe ADSL router is the piece of equipment that actually connects your computers to the internet. The router is a little like the old dial up modems that we all used to use to connect to the internet only a router is much much faster and can connect multiple computers at the same time.

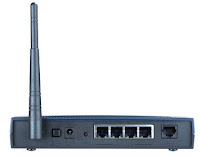
Routers come in many different shapes and sizes. Yours may look just like one of these examples or may look a little different.
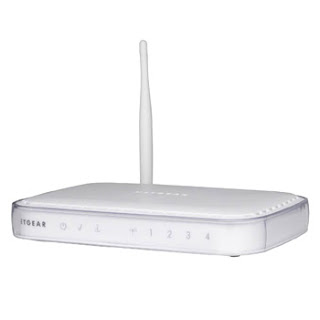
If you haven’t used a router before or your using a new router then it is a good idea to familiarise yourself with the router be reading through the manual. In particular check the manual to see what each of the lights on the router means and what each of the sockets on the back is used for.
The RJ11 cable
This is the cable that connects your router to the ADSL microfilter. Both ends of the cable are the same so it does not matter which way round it is connected.
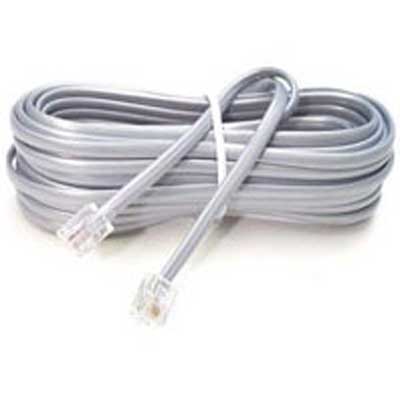
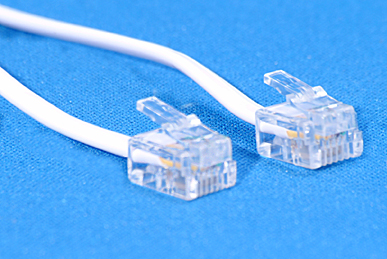
The ends of the RJ11 cable look similar to the network cable that connects between the router and your computer but the plugs are slightly smaller. The cable itself also tends to be thinner than the network cable below.
This is the network cable that connects your computer to your router. If you have two or more computers then you will need one network cable for each computer.
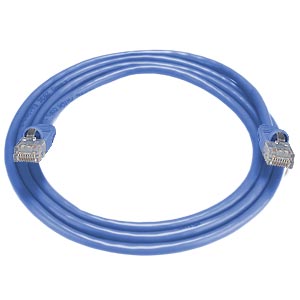
These cables come in different colours and lengths but the various colours do not signify any differences in the cables. (If you have more than one computer to connect then you could use a different colour network cable on each computer. This would make it easier to trace which cable connects to which computer).
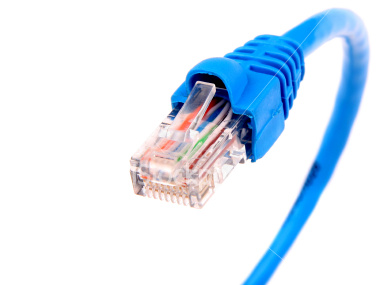
The plugs on each end of the Network cable are identical so it does not matter which way round the cable is connected.
As mentioned above the plugs on this cable look very similar to those on the cable that connects your router to the phone line. The plugs on this cable are slightly larger than the RJ11 above and the cable itself will be a little thicker.
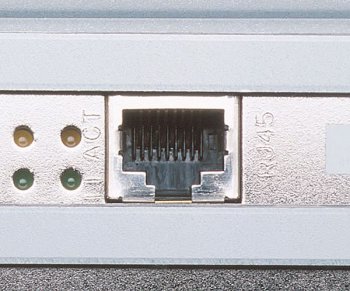
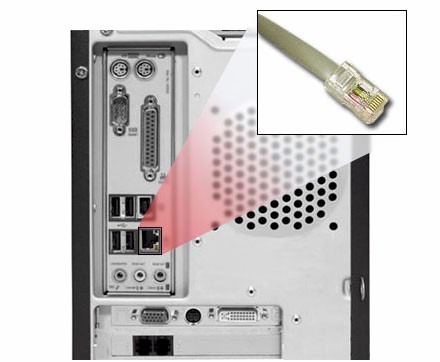
The Ethernet port (This is the network connection on your computer)
There are two ways to connect your computer to your ADSL router in order to get online. Wired or Wireless.
If possible it is recommended that you carry out your initial setup using a wired connection rather than wireless. The main reason for this is that wireless connections can be difficult to set up and it can sometimes be difficult to determine if a connection problem is due to problem with the wireless connection to the router or with the internet connection.
To connect your router and computer via a network cable (Also called an Ethernet or RJ45 cable) you will need a network card on your computer.
The vast majority of desktop computers and laptops made in the last few years have a network card built in during manufacture.
Look for a socket like the one shown in these three pictures. On most desktop computers you will find this socket on the back of the computer. For laptops the network socket may be on the back or on the side of the laptop.
You should be able to connect your ADSL router to any telephone point in your home or office that is on the telephone number that ADSL has been provided too. However we recommend that where possible you connect your ADSL router to the master telephone socket. There are a couple of good reasons to connect your router to the master telephone socket. Firstly the copper wires that make up the wiring for telephone extensions is not as high a quality as the external copper wires that connect to the master telephone socket. Secondly even a minor fault in the way a telephone extension is wired up can affect the quality of the ADSL signal. By using the master telephone socket you should get the best possible speeds and reliability from your ADSL service. Even if you intend to use your ADSL connection from one of your telephone extension sockets it is a good idea to do the initial setup at the telephone master socket and then move the router to the extension once you know everything works OK.
Wired or Wireless?There are two main ways to connect your computers to your ADSL router, wired or wireless.
Wired connections are far simpler to setup and are likely to provide a more reliable, faster and more secure connection than wireless. The downside of course is that you are limited on where you can use the internet connection to where you have network cables. If you want to use several computers in different rooms you will need to run network cables from the router to each location where you need internet access.
Wireless connections can be more convenient as they allow you the ability to move around the house or office and still get an internet connection from any room or even outside. The downside of wireless connections are that they can be tricky to set up, they can be unreliable especially as the distance between the computer and router increases and they can be slower than wired connections. For some people the biggest issue they have with wireless connections is that they are very difficult to secure adequately. The default security options on most ADSL routers will provide some security against casual attempts to access your router but most of the default security options can be bypassed within a few minutes by someone with the right knowledge.
We recommend that you use a wired connection for the initial installation and setup even if you intend to connect wirelessly for normal use.
Once you have determined where you are going to place your router and decided whether to connect via a wired or wireless connection then you are ready to start connecting things together.
Connecting the microfilters
The first thing to connect is the ADSL microfilter. As a general rule of thumb you should connect a microfilter to each telephone socket in the house or office. If there are any telephone sockets that are not used then you do not need to plug a microfilter into these but it is good practice to still do so. If you filter all telephone sockets now (even if they are not used at the moment) then you reduce the chances of a phone being plugged into an unfiltered socket in the future.

Connect the ADSL router to the ADSL Microfilter
You should have received an RJ11 cable with your ADSL router. This looks similar to a telephone cable but with small square plugs on each end.
Take a look at the ADSL microfilter and you should see that the two sockets are clearly marked. Some microfilters will have small pictures of a computer and a telephone to show which socket is which. Other microfilters will have the words ADSL and Phone printed on them. In a few cases there may be no wording or pictures at all. Don’t worry though as the two sockets are very different. The roughly square socket is the one that connects to your ADSL router. The flatter roughly oblong socket is for a telephone.

Plug one end of the RJ11 cable into the ADSL socket on the Microfilter and the other end into the matching socket on the back of your router.
The sockets on the back of each router will be different from one another but these pictures show a couple of common layouts.
The socket that you are looking for will usually be marked with a picture of a telephone or may have the words “Phone” or “ADSL” printed next to them.
When you connect the RJ11 cable to the Microfilter and to the router you should feel (and will probably hear) it click into place. The network or ethernet ports on the back of the router look very similar to the socket for the ADSL connection. The network ports are slightly larger so if you plug into one of these by mistake then the plug will feel a little loose and you will not feel or hear the click when you plug it in.
Connecting the ADSL router to the computer
Look on the back of your router for a set of sockets marked “ethernet” or a series of identical sockets numbered from “1” usually up to “4”.
Each model of router will have its own layout of sockets but most will have a series of 4 network or ethernet sockets similar to those in the pictures.
Each model of router will have its own layout of sockets but most will have a series of 4 network or ethernet sockets similar to those in the pictures.
The RJ45 network cable has identical plugs on each end so it does not matter which end you connect to the router and which to the computer. If you look closely at the sockets will see that they are roughly square but one edge has a cut away. If you then look at the plug on the end of the network cable you will see that is has a small clip on one side. You will find that the plug will only fit the socket one way round and as you push the plug in you should feel and hear a click when the plug is properly fitted. The clip will hold the plug firmly in place.
You now need to locate the network port on your computer. On most desktop computers you will find this on the back of the computer and on laptops it can be on the back or on the side. The socket you are looking for will be identical to the network sockets on the back of the router. You may find that your computer has other sockets that look very similar to the network port but these will be slightly smaller. It can sometimes be hard to tell by eye which socket is for the network cable especially if you’re leaning over the back of a monitor or crawling around under a desk. The plug on the end of the network cable should fit the socket easily and click firmly into place. If you feel any resistance then don’t force it as it’s probably the wrong socket.
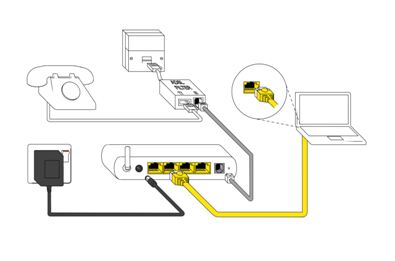
Once you have connected your ADSL microfilter, ADSL router and computer together, your setup should look something like the diagram below.
Plug in the power and switch it all on
Routers are designed to be left on 24x7 so many do not have a power button but if yours does then switch it on now.
When you plug in and switch on your router you will see that some or all of the lights on the front will start to flash or change colour. This is perfectly normal. Most routers will take a short time to start up so allow it a minute or two to fully start up.
Now switch your computer on and let it start up as normal.
Because of the way that your computer and router talk to each other it is important to switch on the router first and allow it time to start up before you start up your computer.
The final part of setting up your ADSL connection is to configure your router and computer. How you do this will depend on weather or not you purchased a pre configured router from Demon or if you bought your own router separately.
If you purchased a router from Demon as part of your ADSL package then we will have preconfigured the router for you.
Follow the instructions above on the physical setup of your equipment. Once your computer has fully started you should be able to open your normal web browser and start browsing web pages without any further configuration. If you have any problems then check out the troubleshooting section of our website.
Using a router that was not purchased form Demon
If you are using a router that you did not purchase from Demon a part of the setup of your new ADSL connection then you will need to provide your router with some connection information to enable it to connect to your ADSL service.
Log into your router
The first thing to do is log into your router. This is normally done by opening your web browser and typing in the network address of your router. Different router manufacturers use different network addresses and connection details so you should refer to the manufacturers’ instructions that came with your router.
Your router manual should talk you through connecting to your router for the first time and logging into the router. The router manual should then talk you through how to configure your new router but of course there will be some information that the router manufacturer will not know like your username and password.
You should work through the manufacturers instructions for configuring the router but using the settings listed below as and when they are asked for during the router setup.
ADSL LOGIN As specified on your Account Card
CONNECTION PASSWORD As specified on your Account Card
VPI SETTING 0 (zero)
VCI SETTING 38
CONNECTION PIPE Relates to the part of your ADSL login after the @ symbol as specified on your Account Card
PROTOCOL TYPE OR ENCAPSULATION
METHOD PPPoA (also known as RFC2364 in some equipment)
METHOD PPPoA (also known as RFC2364 in some equipment)
AUTHENTICATION TYPE CHAP
TRAFFIC TYPE UBR
FRAMING OR MULTIPLEXING METHOD VC/MUX
MODE ITU (For ADSL 1 services this should be) G.dmt (For ADSL 2+ services this should be) ADSL2+ or Multimode or G.992.5
IP Address Obtain automatically from ISP
Default Gateway Obtain automatically from ISP
DNS servers Obtain automatically from ISP
Some router manufacturers will only ask for a couple of these settings so just fill in the ones that are asked for. You also need to be aware that some manufacturers use slightly different terminology and call some of these settings by different names. However even if the router manufacturer does use a slightly different name for one of the settings just look to see if any of the settings options match any of those above. For example some manufactures use the term “modulation” rather than “mode” but the available settings will still be the same.
Once you have entered all of the settings you should follow the manufacturers’ instructions on how to save the settings into the router so that you do not need to keep re-entering them every time you restart your router.
Some routers will restart after you save the settings so allow a minute or so for everything to update and you should then be able to start browsing to web pages using your normal web browser.
If you have any problems then check all of the settings have been entered correctly. In particular check that the username and password have been entered correctly and bear in mind that these are case sensitive and should be entered exactly as they appear on your account card. If you still have any problems then check through the routers troubleshooting guide and also take a look at the troubleshooting pages on our website.
You have shared a good information on the ADSL.
ReplyDelete